How to Register for Classes at UIS: A Step-by-Step Guide
Looking to register for classes at the University of Illinois Springfield? This complete guide walks you through everything you need to know — from accessing your NetID to finalizing your course registration.
Things You’ll Need Before Registering
1. Your NetID and Password
What is my NetID?: Your NetID is the first part of your University email: NetID@uis.edu
NetID Setup: If you don’t have your NetID, you can activate it using your UIN and activation token, which you received in the email you used to apply to UIS.
Have you already used Financial Aid or Student Accounts? Then you've used your NetID before.
Forgotten Password?
If you set up recovery options, reset it here: Reset Password
Otherwise, visit the IT Services Help Desk in person or online. Details here: UIS Technology Support
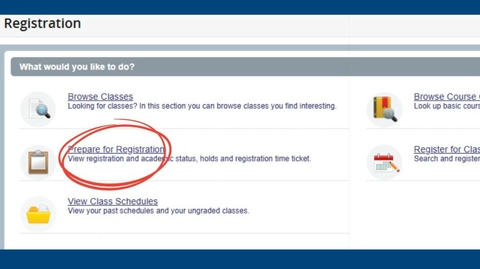
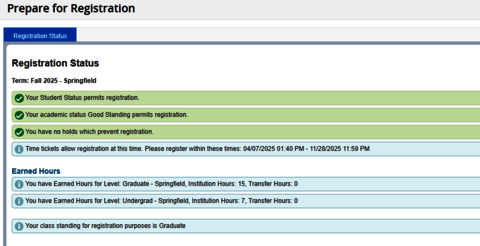
2. Your Time Ticket
A Time Ticket is the earliest date/time you can begin registration.
Check your student status, time ticket, account holds, and curriculum info.
Contact your advisor if any of the information is incorrect.
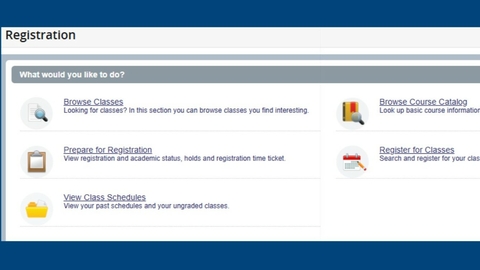
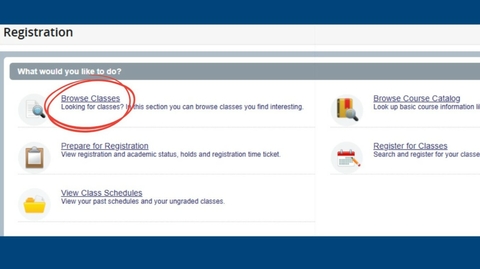
Step 5: Browse Classes
Select the term and click Continue.
Choose the subject or enter keywords, the Course Registration Number (CRN) or title.
Use Advanced Search to filter for open sections.
You can not register for classes in this tab.
Have a general idea of what classes you need or want to take before meeting with your advisor and meet with them before registering for classes. You can schedule an appointment with them through the Advise U app, which is available through the UIS Mobile App.
💡 Pro Tip: Use tools like Coursicle to test potential schedules and include time for meals and travel time.
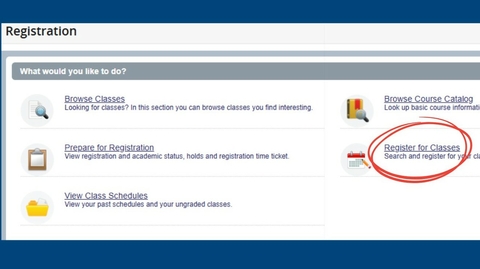
Step 6: Register for Classes
Select your term.
Agree to the consent screen (you’ll receive a copy by email).
Register by searching for classes or entering CRNs directly.
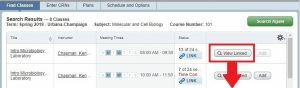
💡 Pro Tip: If seats are limited, click submit immediately to secure your spot.
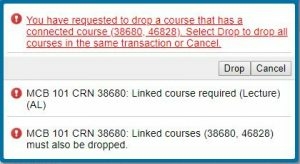
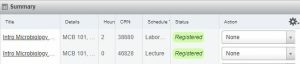
If a class has linked sections (e.g., lecture + lab), register for all required parts to avoid errors.
To add a class:
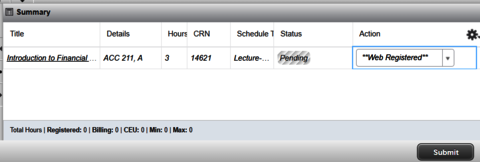
Click Add (it appears in "Pending").
Click Submit to complete your registration. You will see the status change to “Registered” if no errors are present.
To drop a class:
Go to the Summary panel in the registration portal.
Select "Web Drop Course" from the drop-down menu next to the class.
Click Submit to finalize.
⚠️ Note: You can only drop courses until the deadlines listed in the semester calendar (available under the Registration Semester Information section). Dropping your last/only course may require additional steps.