
Canvas is a web-based course management learning system that UIS instructors can use to organize course content. Canvas allows instructors and students 24/7 access to their courses.
A Canvas course site is created for each course section taught at UIS, regardless of modality -- online, blended, hyflex, or on campus. Canvas has an easy-to-navigate interface on the web and via a mobile app. There is a separate app for instructors and students.
Canvas contains many tools for presenting information and assessing student learning, such as quizzes, assignments, and content pages. Canvas also contains tools for interaction and engagement such as discussions, collaborations (Google Docs, Slides, Spreadsheets), chat, and peer reviews. UIS purchases other tools that work inside Canvas, too, including Zoom, Kaltura My Media video creation and management, and Harmonize multimedia discussions.
Instructor Guide
The Instructor Guide is a Canvas course that includes links to important campus resources. Learn more in this short Instructor Guide overview video.
Building Digital Community
The UIS professional development course Building Digital Community provides an overview of the issues and trends surrounding online teaching and learning, as well as helpful information as you begin teaching on our campus.
Where are my course sites for teaching?
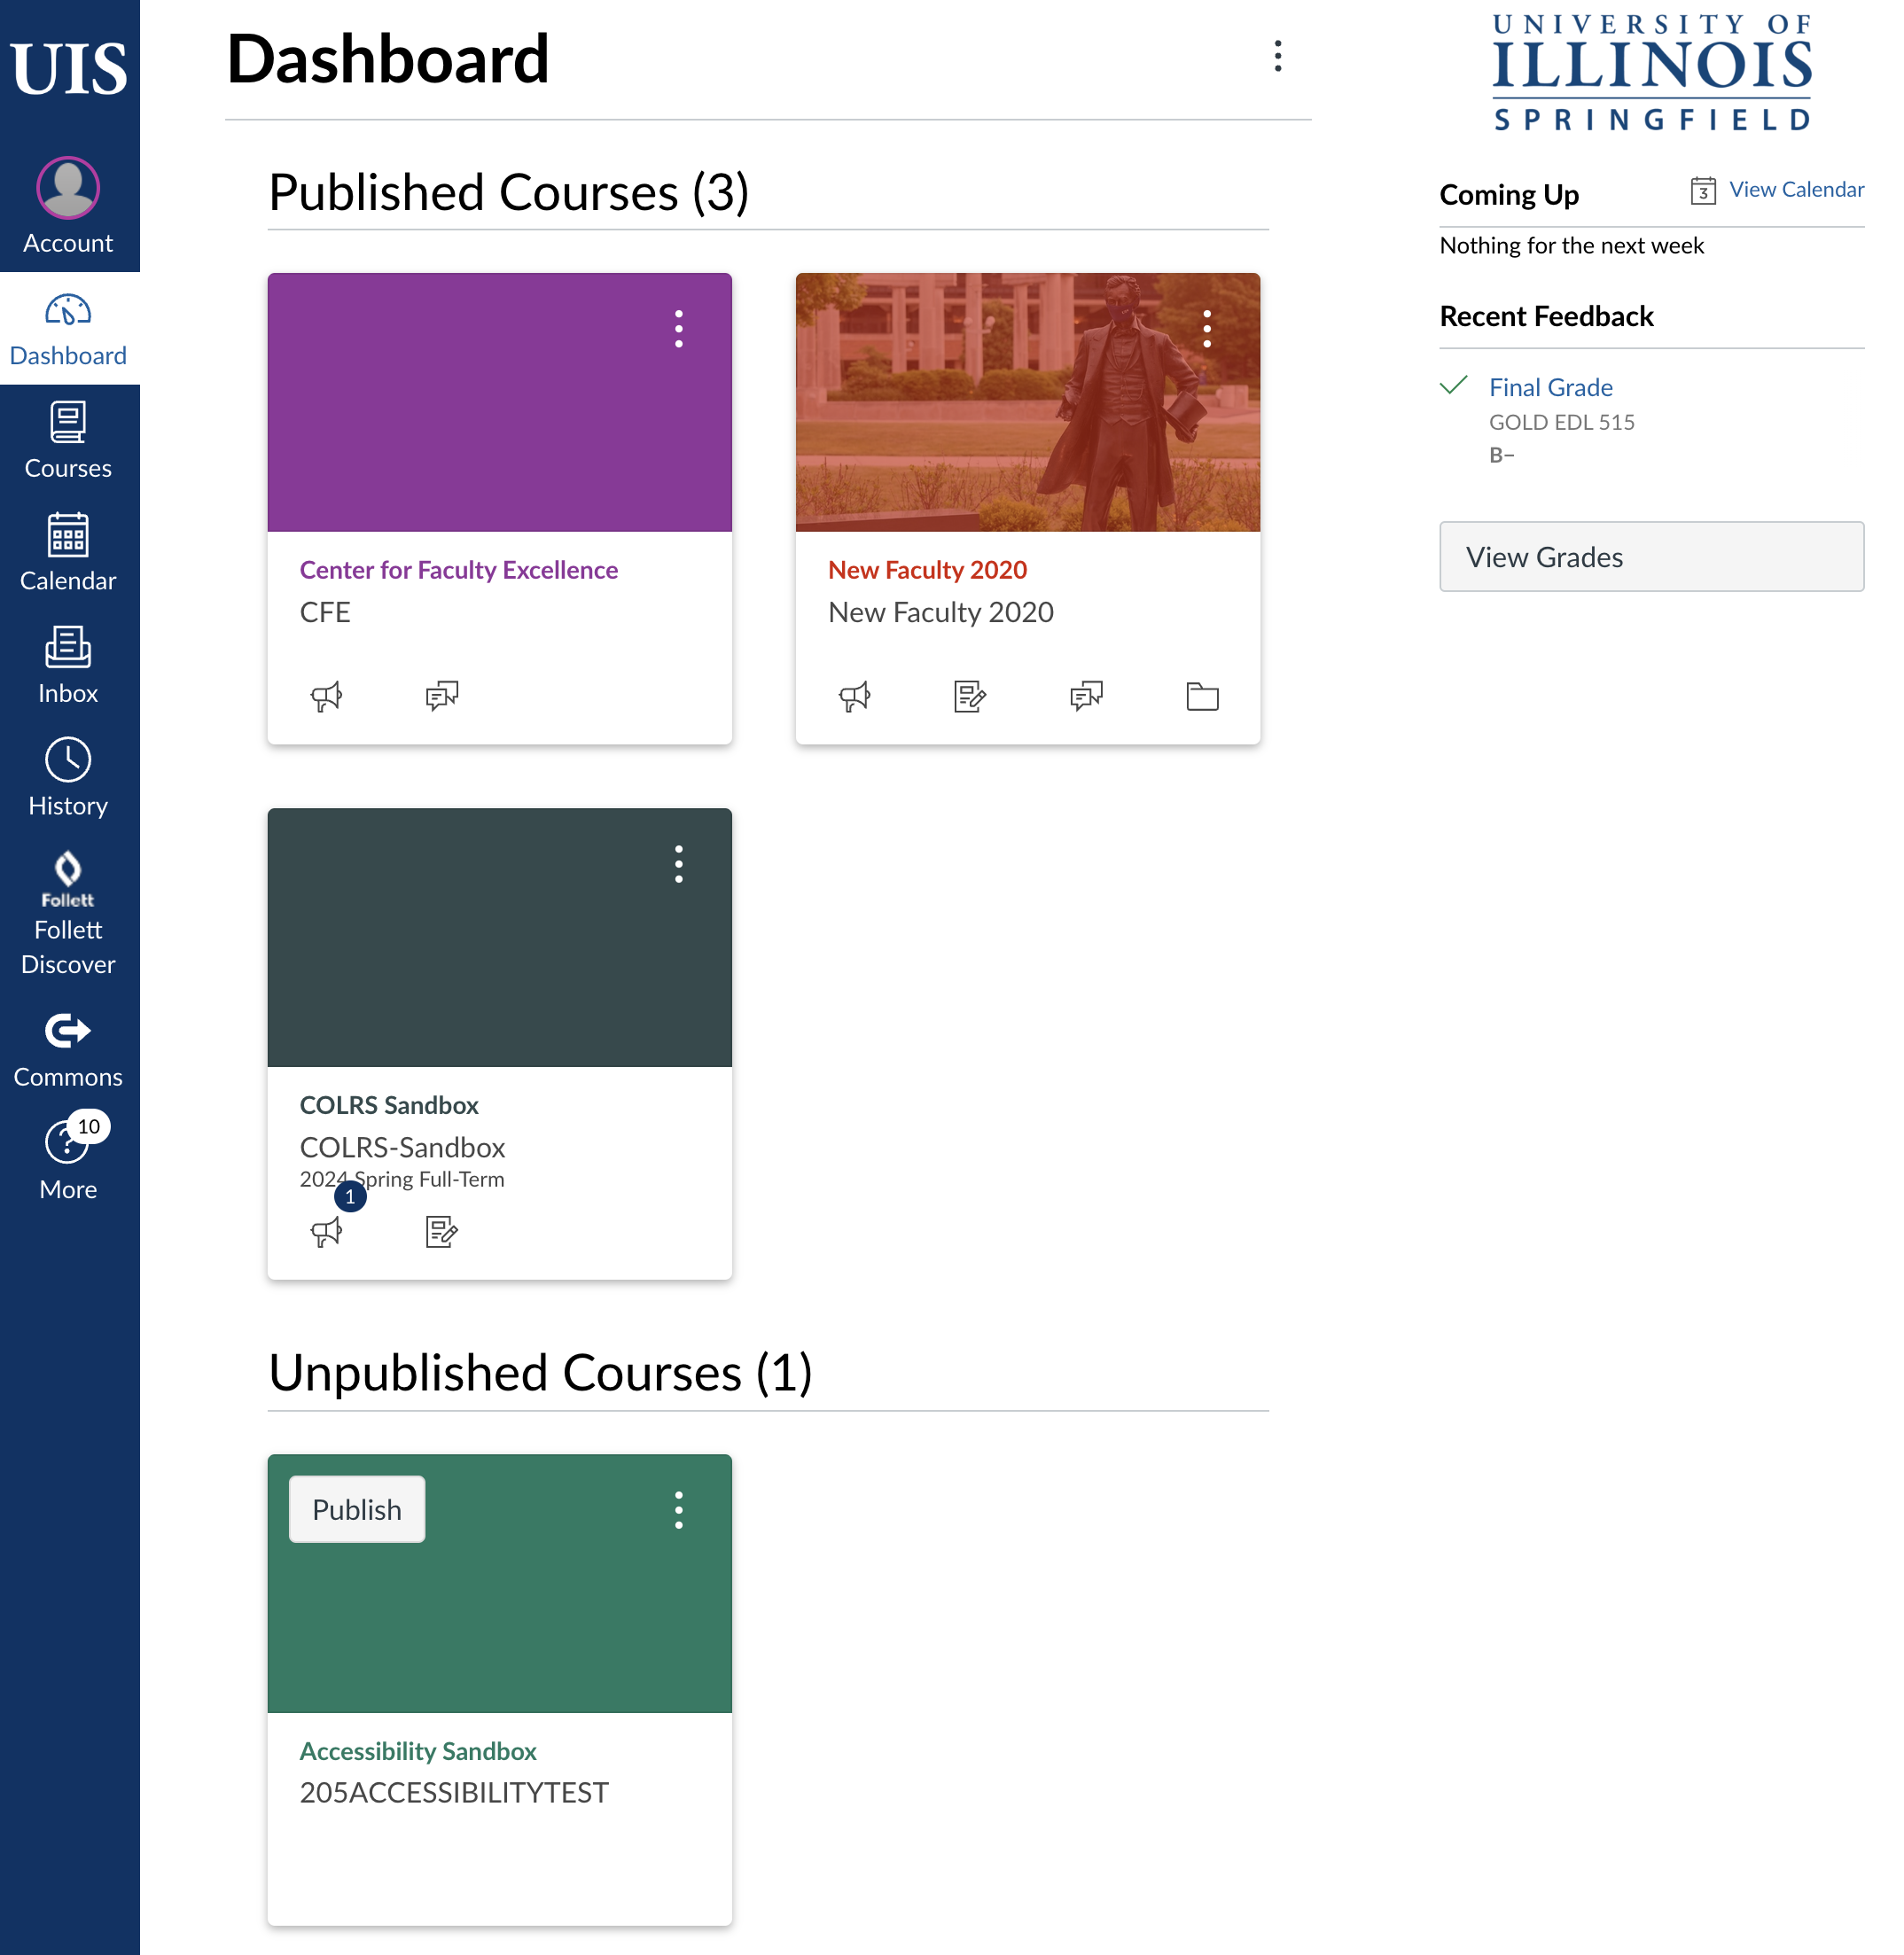
You will find your courses on Canvas. Instructors who have been hired and issued a UIS NetID will be able to log into Canvas.
In Canvas, course sites, instructors, and students are added and removed based on the UIS dynamic course schedule and Enterprise Self Service. Summer and Fall semester courses are created in Canvas in late April. Winter and Spring semester courses are added in early November. If you don't see your upcoming courses and are listed as the instructor on the Course Schedule, then contact COLRS and we will assist you. If you are not listed as the instructor, then contact your Dean's office to be added to the official Course Schedule.
Students are enrolled approximately two weeks before each semester begins. Instructors who are listed in the course schedule can view course rosters and obtain lists of student email addresses.
Instructors are welcome to publish their Canvas course sites before the first day of class to allow students early access to course syllabi and materials. Canvas courses will be automatically be made available to students at 12:01 a.m. on the first day of classes each term. Deans receive a list of blended and online courses that do not contain an updated syllabus and/or learning materials that would be visible to students on the Thursday before courses begin.
Access to past Canvas courses
Canvas course sites are not deleted. After the end of each term, courses go into a read-only archived state for instructors. This maintains a record of the course as it was taught, which is helpful for incompletes and grade challenges. See the Canvas guide on how to view all your courses. Information about incomplete course grades and Canvas access is in the accordion below.
All past courses may be copied into other course sites using the import tool.
Copying and sharing course content at UIS
Instructors may use the Canvas import feature to copy content. Learn more on the Copying Canvas Content page.
At UIS, we designate certain courses as gold courses to enable collaborative content development and content sharing while ensuring student data privacy. Instructors may request gold courses from COLRS. Learn more about gold course sites.
Another option for sharing content is the Canvas Commons platform. Instructors can choose to share content just with UIS instructors or with the wider Canvas user community. Learn more about Canvas Commons.
Canvas syllabus templates
Every UIS courses is required to have a syllabus to students with learning objectives and other required information and statements. The provost makes accessible Word syllabus templates available. COLRS recommends using the Canvas native course syllabus template; it is accessible, provides many formatting options, works well on mobile devices, and is printable.
Canvas Basics
In the workshop recording below, COLRS staff walks through some of the most important features of Canvas, including what links are in the global menu, how to put content in a Canvas course, and how to ensure students see the most important updates.
Accessibility Checker for Courses
UDOIT is a powerful tool available in every UIS Canvas course to help instructors to make course content accessible. Learn how to use UDOIT.
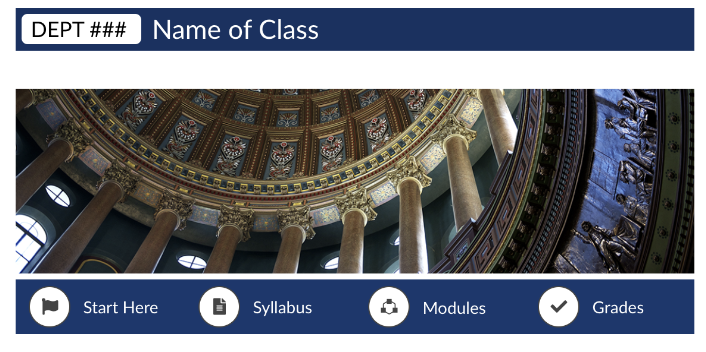
Add a Custom Canvas Home Page
Create a visually pleasing home page to welcome students and guide them into your course using the DesignPlus toolbar for Canvas.
Add Videos to Canvas
Intentionally designed instructional videos are powerful learning tools for students. Learn to add videos to your Canvas course.
Harmonize Discussions
The Harmonize discussion tool in Canvas enables media rich interactions. Increase engagement in your class! All participants can add images, audio and video (with auto-captions!), polls, and annotate PDFs.
Canvas Ideas & Themes
This feature allows all Canvas users to suggest and prioritize ideas for updates to the LMS. If there is a feature you'd like to see, suggest an idea and vote on existing themes and ideas. Canvas is currently revising the way they allow feedback to be provided; we will share more information about the updated process when we know more.
Quality Assurance in Online Courses
UIS subscribes to Quality Matters and has adopted a customized version of the research-based QM rubric for course quality assurance. Individual instructors or entire programs may request to have their courses reviewed.
Canvas Resources
Get Started Using Canvas for Teaching
+
If you've never used Canvas before, you've come to the right place! The COLRS team is ready to help you. You're welcome to reach out to us by email (colrs@uis.edu), by phone (217-206-7317), or by booking a one-on-one appointment anytime. To get started, though, here are some answers to frequently asked questions about getting started in Canvas.
Home
Home is like the entry point for your course. In Home, you can add files, pages, links, and assignments to modules, which are like buckets that can organize your course into weeks or item type.
- How do I add a module?
- How do I move or reorder a module?
- How do I add assignment types, pages, and files as module items?
- How do I add an external URL as a module item?
- How do I view a course using a test student?
Announcements
Announcements are a way to send crucial and time-sensitive information to your students. A preview of the most recent three announcements will always show up on the Home page of the course.
Assignments, Grades, and Quizzes
For information about assignments, grades, and quizzes in Canvas, we've compiled some resources on our Assessing Learners page.
Discussions and Groups
We have strategies for creating engaging discussions on our Assessing Learners and Engaging Learners pages. However, if you're looking for information on how to create discussions and groups in Canvas, review the following articles:
- How do I create a discussion as an instructor?
- How do I reply to a discussion as an instructor?
- How do I add a group set in a course?
- How do I create a group discussion in a course?
Administrative
Before students can see your course (or any of your materials), you will need to publish it.
- How do I add an image to a course card in the Dashboard?
- How do I use the People page in a course as an instructor?
- How do I set my Canvas notification preferences?
- How do I copy content from another Canvas course using the Course Import tool?
- How do I publish a course?
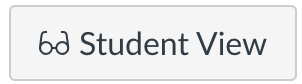
Using Student View
To see the student's perspective on Canvas, use Student View to view the course, post and reply to discussions, submit assignments, view grades, view people, view pages, view the syllabus, view quizzes, view the calendar, etc. Enabling Student View creates a Test Student in your course. You can also activate Student View in your Course Settings.
To access Student View through your course home page, click on the Student View icon on the upper right.
You can now view the course as a student user would see it. For example, students cannot see the Settings navigation link like instructors can.
You will know if you are in Student View because of the persistent box on the bottom of the screen indicating you are logged into Student View.
Click Leave Student View to return to your instructor view.

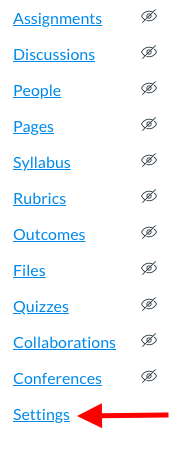
Course Navigation
As an instructor, you can control which links appear to your students in your course menu. Canvas includes a set of default Course Navigation links that cannot be renamed.
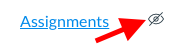
All menu items with an eye that has been crossed out cannot be seen by students.
To enable links for students, follow these steps:
- Click on Settings at the bottom of your course menu:
- Find the Navigation tab:

- From the Navigation page, you can re-order menu items using the drag-and-drop interface.
- You can also "enable" a menu item, by clicking on the "kebab" (three dots) associated with the menu item and choosing "enable."
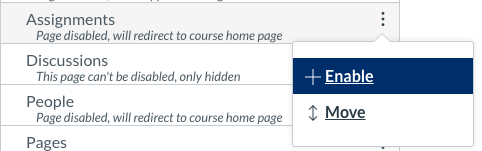
- Be sure to click "Save" at the bottom of the page to save your changes.
- Note: Some navigation areas, such as Announcements, can be enabled, but show the "hidden" icon when there is no content. Adding content will enable students to see the menu item.
Canvas Accounts & Course Access
+
Student Access
Students are enrolled in courses approximately ten days prior to the course start date academic term courses. Students are enrolled and dropped from Canvas course sites automatically based on enrollment data from the Office of Records and registration. Instructors may not add or remove students in academic term courses. Courses will publish automatically at 12:01 a.m. on the first day of classes, which makes them available to students. Instructors may publish their courses early. Courses close to students on the Friday before the next term starts.
Students may be manually enrolled in orientation, department, and other courses. If students require TA or supplemental instruction (SI) access to an academic term course, contact COLRS.
Students with Incompletes: If a student received an incomplete in a course, student and faculty access to the course will be automatically extended for one year. If an instructor prefers that a student complete their work in a Canvas course in the current term, contact COLRS for assistance.
Instructor Access
Canvas courses for future academic terms are created approximately two months prior to the course start date. Instructors are enrolled in Canvas course sites when they are listed on the UIS dynamic course schedule. Instructors may be manually enrolled in orientation, department, and gold courses.
New full and part-time faculty: If you have new part-time (adjunct) instructors who need Canvas access to develop courses, the best practice for providing Canvas access is to issue their employment contract. When the employment contract is executed, your new instructors will have their NetIDs and may be added to Canvas courses. The External Affiliate NetID accounts creation process, detailed under Guest Accounts below, is often slower than the normal hiring process. The External Affiliates program should only be used in rare circumstances for part-time faculty Canvas access.
Access for Employees who are Not Instructors
Create a Canvas Account
If you are new to UIS, or you are an employee who has never accessed Canvas before, you will need to activate your Canvas account before you can begin working in Canvas. A NetID is required to access Canvas.
- Visit the Canvas login page at uispringfield.instructure.com
- Log in with your UIS NetID and password.
- Learn about how to locate your campus NetID or reset your NetID password
- Once you have logged in to Canvas, your account has been activated.
Access to Courses
Employees may be manually enrolled in orientation, department, and gold course sites. Employees who need access to academic term courses must complete FERPA training and approved to be enrolled in courses. FERPA training must be completed for all employees who have access to academic term Canvas courses, including: academic coaches, student tutors, teaching assistants, assessment coordinators, and Learning Hub staff. Permission must be granted by the instructor of record and/or UIS administrators, depending on the situation. Contact COLRS for more information on gaining access to academic term courses.
Guest Accounts (NetID Affiliate)
All users must have a NetID to have access to UIS Canvas.
If you or your unit needs to provide access to Canvas or other campus resources for guest lecturers, site internship supervisors, or accreditation work, the External Affiliate NetID process can be used to create a NetID account for these people.
To request an account using the External Affiliate UIN and NetID program, you will need the full name, birthdate, and email address for the guest. This process can take up to two weeks, as the iCard center has to verify whether the user has previously had a NetID on any campus.
Once affiliate NetID accounts have been created, the department chair should contact COLRS for assistance with Canvas access. Department chairs, school directors, and deans may request that people who are not official instructors to be added to courses.
Alternately, if you were planning on simply using Canvas to share documents and files with your guest, consider using Box instead.
Students with Incompletes
+
Students who have been assigned an incomplete in Enterprise will automatically be granted extended access to the corresponding Canvas course, for a period of one year. For example, all students who earned an incomplete in Summer 2021 already have access to the corresponding course in Canvas until August 2022, in order to give them time to complete all coursework before their provisional grades become permanent. No action is required on the part of the instructor to grant this extended access to the course, other than timely submission of grades in Enterprise.
- Instructors should still communicate their expectations regarding the completion of the course with any students who have received an incomplete.
- Instructors should still submit incompletes and provisional grades in Enterprise by the Registrar’s due date each semester.
- Instructors should still submit grade changes to the Registrar according to the current procedures when students have successfully completed a course.
- Students who did not receive an incomplete will still lose access to the course the week before the start of the following semester.
In case a student with an incomplete finishes their work before the year is up, and you wish to remove student access to your course, please contact COLRS for assistance.
Adding Additional Canvas Assignment Due Dates for a Single Student
Though access to the Canvas course site is automatically extended for students and instructors in courses with incomplete grades, specific assignment due dates may need to be modified. If the availability for an assignment has passed, and some other specific Canvas course assignment settings, some instructors may need to add a new assignment due date for the student with an incomplete. Learn how to add a Canvas assignment due date for a specific student.
How to Combine (Cross-List) Course Sections in Canvas
+
Cross-listing courses in Canvas moves the enrollments from an individual courses to another course. This feature is helpful for instructors who teach several sections of the same course, or whose courses are cross-listed in several different departments, and only want to manage course data in one location. Instructors can allow students to view users in other sections or limit them to only view users in the same section.
Cross-listing should only be requested before a semester has begun or before any student work has been submitted. Student progress, including assignment and quiz submissions, will not move with the section enrollments. If you request your course to be cross-listed after students have begun working on their coursework, their progress (including grades) will be lost.
Courses that are cross-listed in the UIS course schedule are automatically cross-listed in Canvas. To combine courses that are not automatically cross-listed, please contact COLRS.
Are you running out of storage in Canvas?
+
COLRS staff has noticed that file storage in some courses is quickly filling up – and in a few cases, faculty are running into limits. Canvas restricts each course to approximately one-half of one gigabyte, or 500 megabytes. While this is more than enough for the vast majority of courses at UIS, you may run up against this limit if you are uploading many larger files directly into Canvas, including video files, high-resolution images, and narrated PowerPoints with embedded audio. When a course runs out of space, faculty and students may be unable to add additional files.
(To check how much storage each of your courses is using, simply select that course from the Canvas dashboard and click the “Files” link in the left-hand navigation panel. Your storage used is displayed towards the bottom of the screen.)
To avoid this issue, COLRS recommends using Kaltura to host all media files and Box to host all or most course documents. There are several advantages to this approach:
- Files hosted in Kaltura and Box do not count against your Canvas storage allocation, and both services include unlimited storage.
- Kaltura has extra accessibility features not included with the built-in Canvas media player, including closed captioning. State and federal regulations require us to ensure that all media files provided to students are accessible.
- Box allows you to quickly make changes to your documents directly through a web browser, without needing to download and re-upload files. Changes made to your files in Box are available immediately when those files are embedded in your courses in Canvas.
To get started using Kaltura, please review our Kaltura Media overview and instructions for adding Kaltura Media videos to Canvas courses. COLRS also provides instructions that instructors can copy and paste into their Canvas courses to use for assignments in which students must submit a video.
ITS provides more information on using Box, and COLRS has also created a video tutorial demonstrating how to embed Kaltura and Box files into your courses:
My Canvas Links Don't Work
+
Many faculty who have imported course content from Blackboard have founds links that appear to be active don’t work. Here are common issues with imported links, and the steps you can take to fix your links.
Problem #1
When I or my students click on the link, we receive an error message which says the content is insecure. I know it is a good link to a safe website. What can I do?
Explanation:When a link has been created for a site that does not use the https: (secure) protocol, Canvas will return a message about “insecure content,” because Canvas is a secure (https:) site.
Solutions:
- When including the link in a module, set the link to open in a new tab.
- Create a new link in a Canvas “page”
Problem #2
My link shows as “broken” but I know it works. What can I do?
Explanation:Canvas uses “iframes” to display webpages. There are many websites (including the UIS website) that do not allow pages to be displayed as iframes for security purposes, and this can make the links appear broken in Canvas. These links, when imported from Blackboard, are often listed in a module, but as unpublished. This helpful feature helps us to remember to check how these links will display to students.
Solutions:
- When including the link in a module, set the link to open in a new tab.
- Create a new link in a Canvas “page”
Problem #3
My imported Kaltura links no longer work, but I know my videos are still there. What can I do?
Explanation:If you Kaltura media links have “BBLEARN”included in the link, they are linking to the My Media area in Blackboard. Students will not be able to view them.
Solution: Follow the steps in this video below to add Kaltura media links to your Canvas course.
Customizing the Canvas Dashboard
+
Many faculty members have contacted us about how to “unpublish” courses from last semester to manage the courses that appear on their Canvas Dashboard screen.
Courses cannot be unpublished after students have submitted work, but you can customize which active courses you want to show in your Course list and Dashboard. Courses you want to show in the Courses menu are called favorite courses. You can favorite any active course that appears on the course list page.
When no courses are favorited, the courses list automatically displays up to 20 courses alphabetically in the drop-down menu. However, once you have selected at least one course as a favorite, only your favorite courses will appear in the Courses list.
Note: Courses are initially listed alphabetically, but you can reorder your courses manually.
Preferred Name in Canvas
+
Students
Students may designate a preferred first name that certain University systems, including Banner, Email, and Canvas, will then use.
In Canvas, the preferred name will appear in place of the legal first name. In Banner, both the legal first name and preferred first name will appear. A preferred first name may take several days to roll out to all systems.
Learn more about the University-wide preferred name policy.
Faculty and Staff
Faculty and staff who are employed by UIS may set their preferred first name in the My Profile tool from System Human Resources. Log into the app and click edit under Demographic Information & Veteran Status. Enter (or correct) your preferred name. It will take some time for Canvas to update your name, usually within a couple of hours.