

UIS Staff has access to Photoshop with the Yearly Adobe Creative Cloud License from the Webstore.
How to:
Crop in Photoshop
+
- Open Photoshop
- Go to File in the menu
- Click on Open
- Navigate to your image through the file browser
- Open Image
- Click on the Crop Button
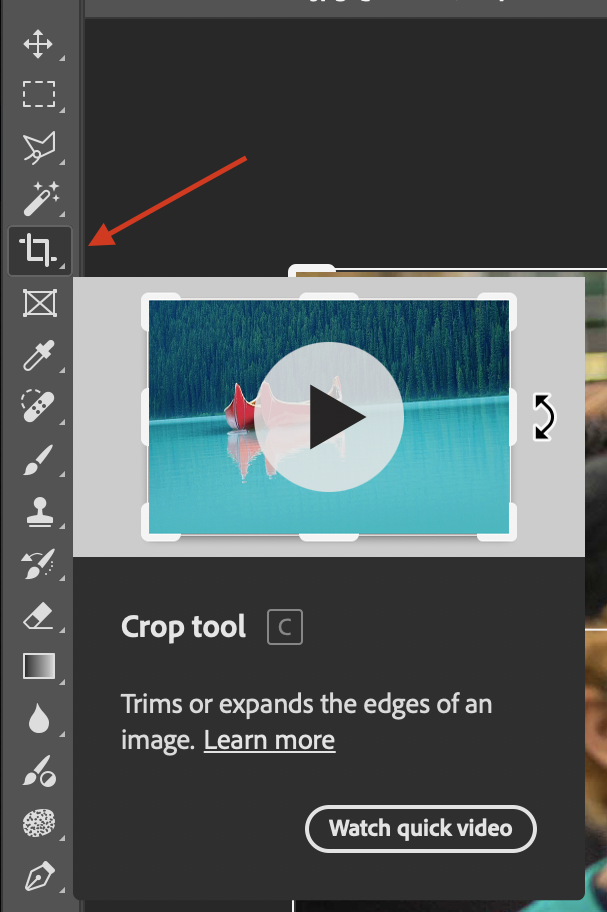
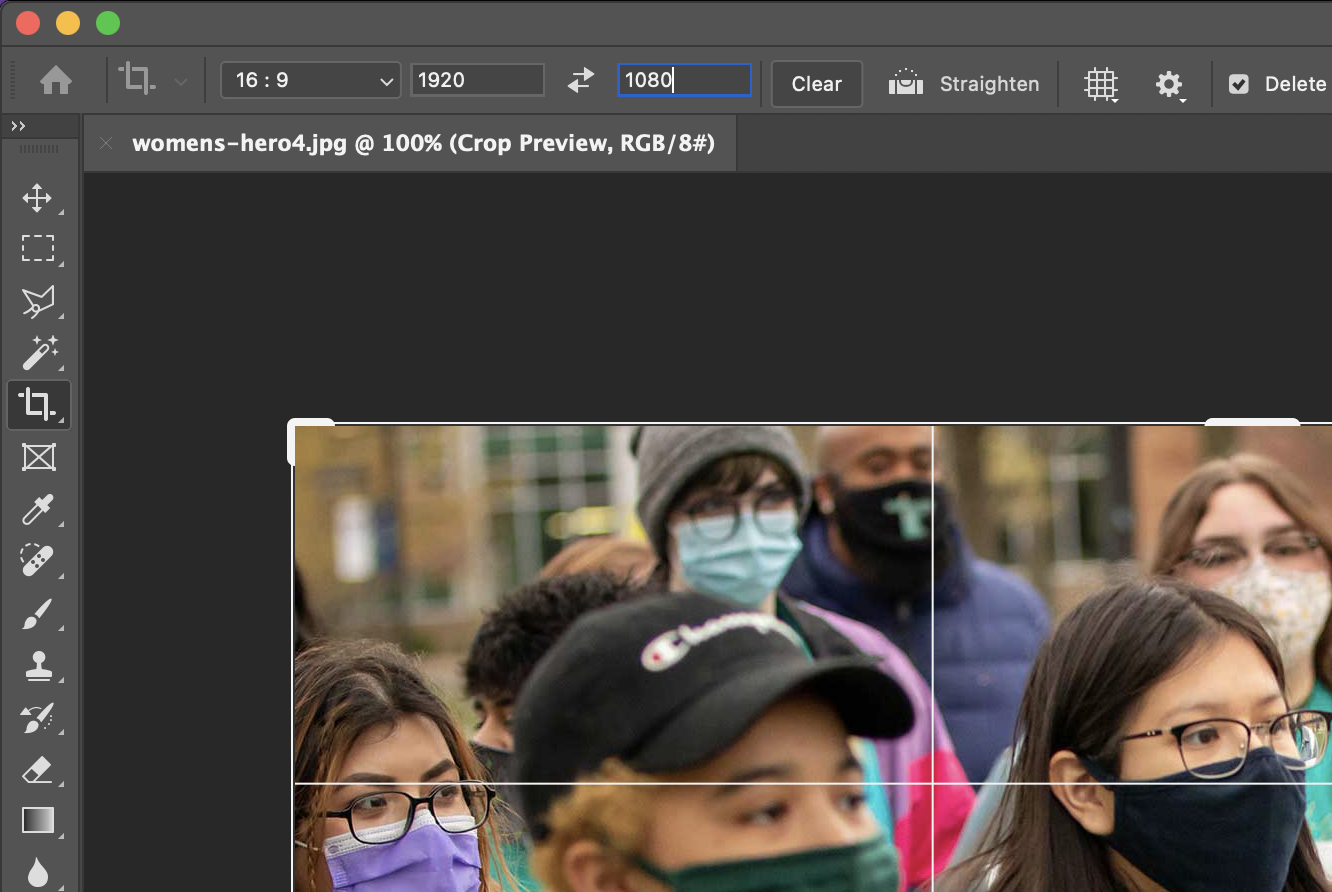
- For cropping an image to a certain size, put in the appropriate pixel count into the ratio text boxes (in this example we are trying to get an image that can be resized to 1920px by 1080px for a header image without warping)
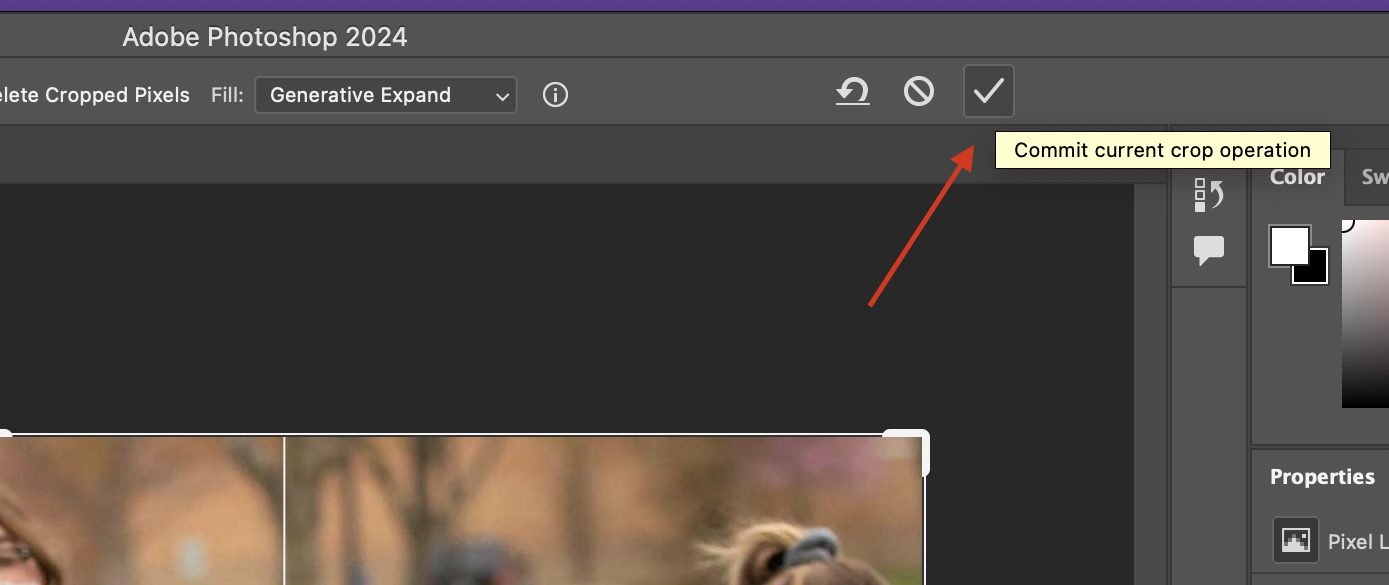
- Once you have adjusted the crop to where you want it, click on the check mark in the upper toolbar to accept your changes and officially crop your image
Resize in Photoshop
+
- Open Photoshop
- Click Open
- Navigate to the folder where your photo is stored, select your photo, then click Open
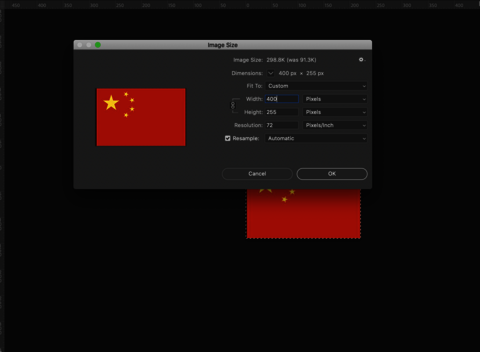
- Check the size of the photo by clicking on the Image menu, then click Image Size
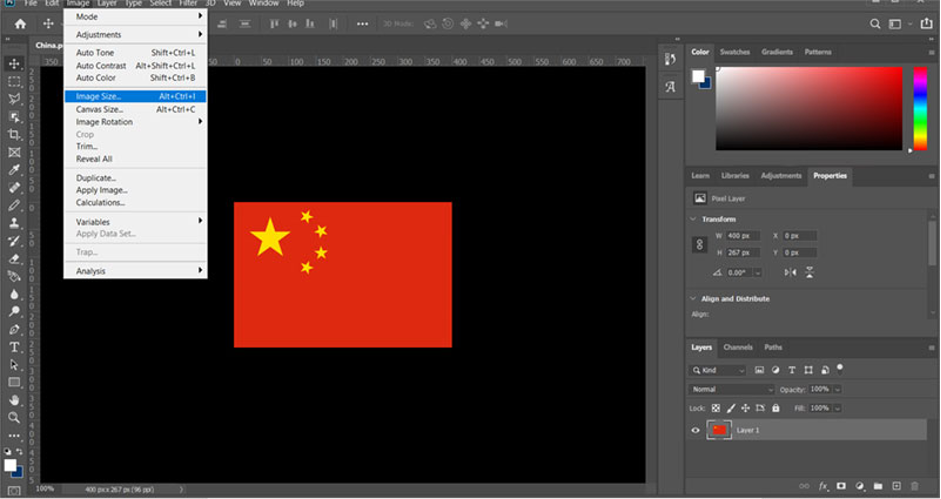
Update the image size to display on the screen at the size you want. First change the resolution (dpi) to 72, then adjust the height and/or width to the desired size. Here is a list of image sizes typically used across the site. Make sure to keep the image aspect ratio. If you change the height or width, the other value should automatically update. If not, ensure the link symbol is active next to the height and width fields.
Color Correct in Photoshop
+
Let's say that you notice that the color is off in a photo or you want to make sure a photo is leaning too heavily in a specific color. There's a really easy way to check and make these adjustments even if you are unable to see certain colors!
- Open your image in Photoshop
- Go to Image in the toolbar at the top of the screen, then go to Adjustments > Levels.
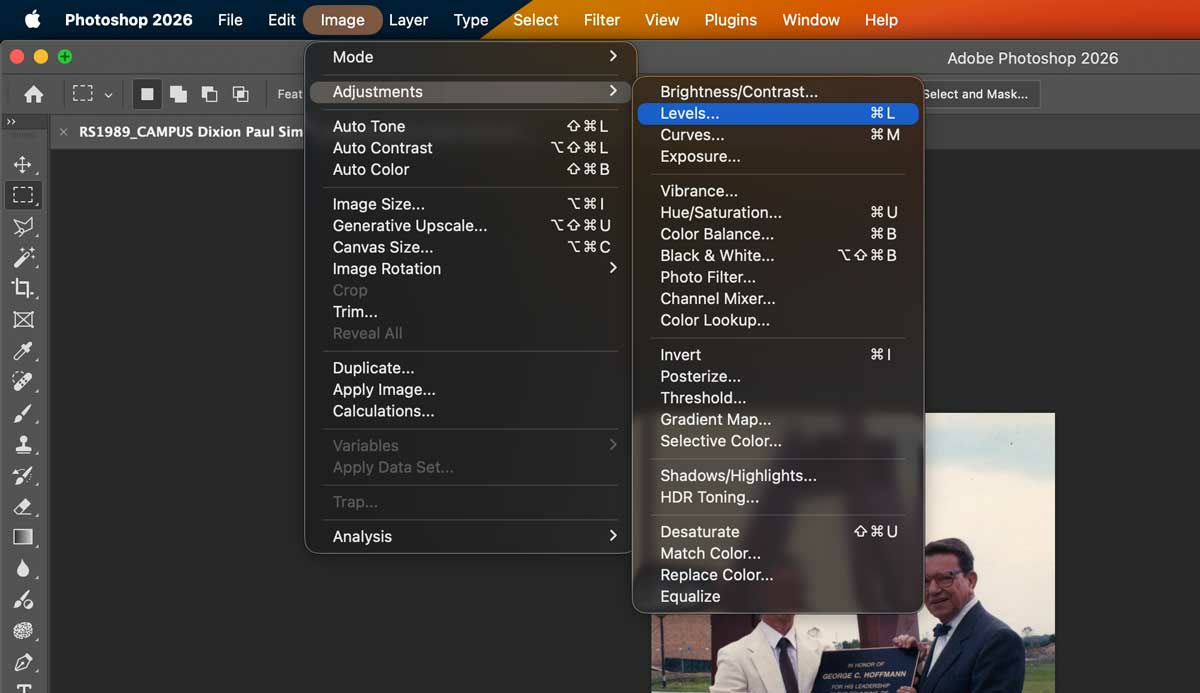
Here you will notice a drop down selector with your images "channels." They will most likely be RGB, Red, Blue, and Green. You'll want to go through each channel and make sure that the sliders below the wave shown are placed at the very end of where the wave actually begins and ends (not just at the very end or beginning of the slider positions).
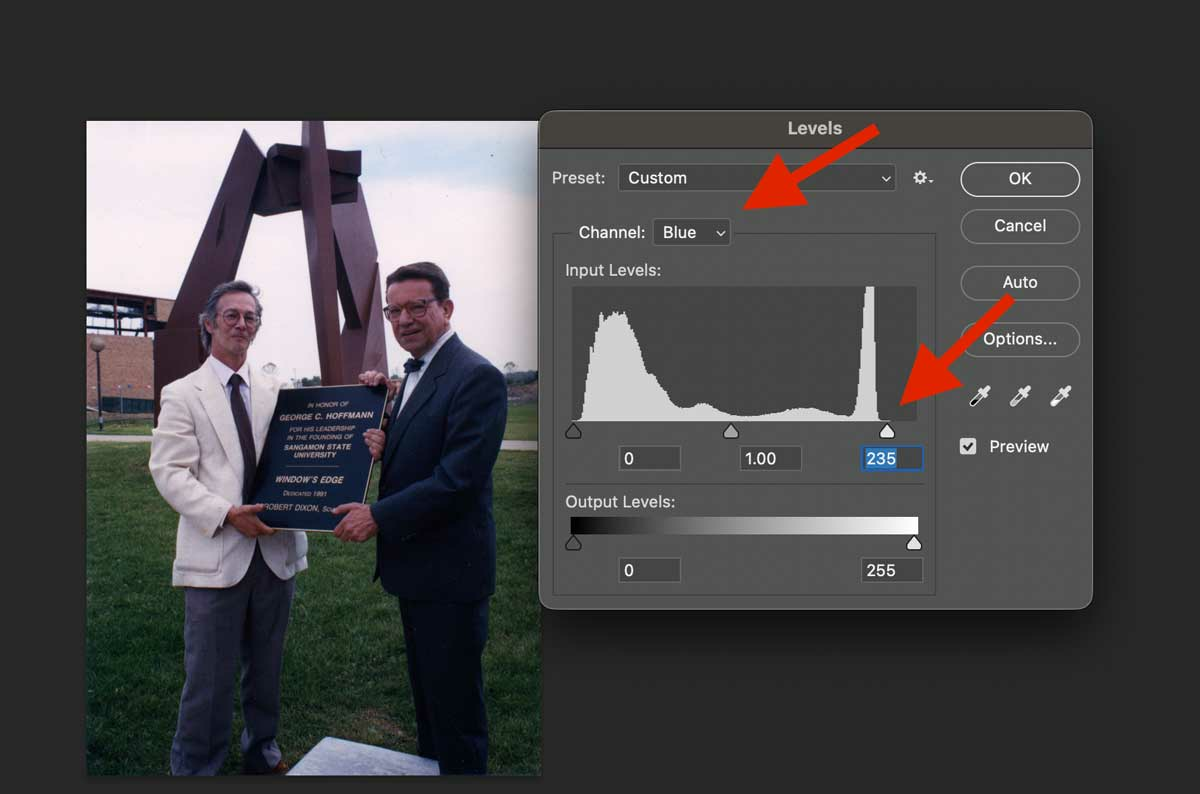
Make sure you check each channel to see if it needs adjustments. You can also preview your changes by clicking on and off the preview button on the Levels dialog box.
Save for the Web in Photoshop
+
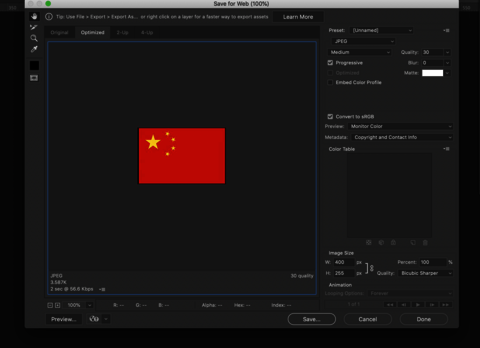
To save the image for web, open the “Save for Web” tool by going to File > Export > Save for Web(legacy).
Shortcut:
Mac is CMD + opt + shift + s
PC is Ctrl + alt + shift + s
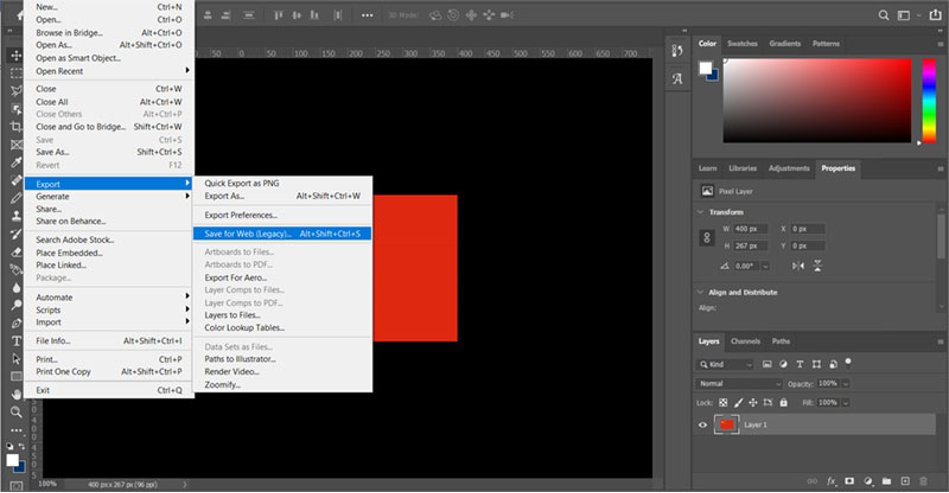
- Make sure the settings are set to:
- Preset: JPEG Medium
- Progressive should be checked
Name the photo something that anyone can understand so can be easily searched for in the media library later on to find