


Download the UIS Examity Quick Guide for Students.
1. Accessing Examity
You can access Examity® through your course on Canvas. Click on the Examity link within the course.
Click to log in to Examity.
This will take you to your Examity dashboard.
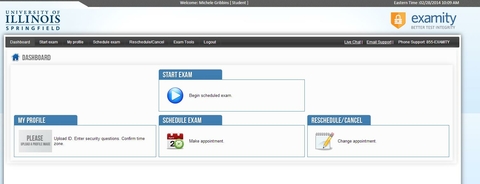
From here you can edit your profile, schedule exams, and make changes if you need to cancel or change a test time. Most importantly, this is where you’ll go to start your exams.
2. Getting Started
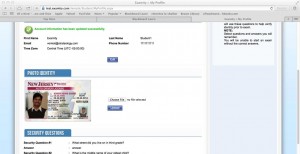
Setting Up Your Profile: To get started, update your Examity® profile by clicking on the My Profile section of the Dashboard. You will need to upload a picture of your UIS Student ID or a government-issued photo ID, select your time zone, and set your security questions.
Please note the importance of selecting the correct time zone. This will be used in scheduling your test with the proctoring center. You can confirm your selected time zone by looking at the time in the upper right-hand corner.
Once you have set up your profile, you can bypass this step for future exams.
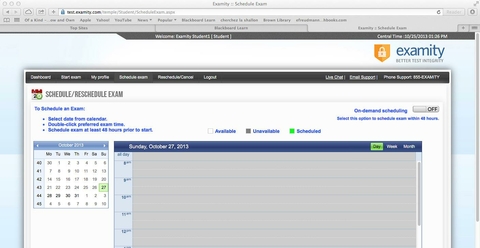
Scheduling Your Exam: When you are ready to schedule an exam, click “Schedule Exam” on your dashboard or on the top navigation bar.

You will see a calendar. If you are scheduling your test more than 24 hours in advance, you can just select the date and time you want. If you are scheduling it less than 24 hours in advance, make sure the on-demand scheduling option is enabled in the top right-hand side of the screen.
Paying for Exam Proctoring: You will pay for your exam proctoring session at the time you schedule the exam. After you enter your payment, be sure to wait until you are redirected to the Examity Dashboard screen before closing your browser. This will result in the payment not being processed and your exam not being scheduled.
Rates for the proctoring sessions (expand the Examity area at the bottom of the page) vary based on the length of the exam and the level of proctoring service selected by the instructor. Additional fees apply if you use on-demand scheduling (exam occurs within 24 hours).
Rescheduling or Canceling Your Exam: If you need to change or cancel your test appointment, click Reschedule/Cancel, and select the exam you want to change from the menu that appears.
3. Taking Your Exam
To take your exam, make sure you have your webcam and microphone set up on your computer. Sign into Canvas, then your class. Return to the Examity® Dashboard by clicking on the Examity sign-on link within your class.
Click to log in to Examity.
This will take you to your Examity dashboard.
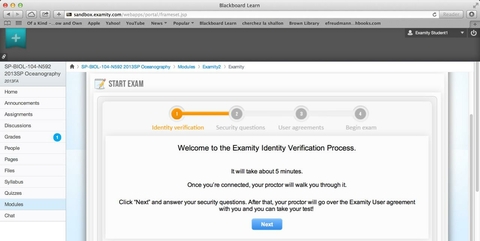
Once on the Examity dashboard, click “Begin Scheduled Exam”, and select your exam. You will then be connected to your proctor. Note: MAKE SURE YOUR POP-UP BLOCKER IS DISABLED otherwise you will not be able to connect with your proctor!
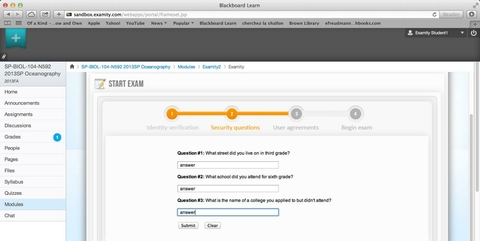
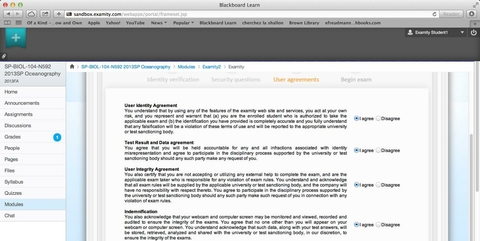
Your proctor will walk you through the test authentication process, which will include verifying your identity, going over the exam rules, scanning your work area and desk, answering your security questions, and agreeing to the User Agreement.
Once you have finished the authentication process, you will see a screen that says “Begin Exam”, and your exam will open. If your test is password protected, your proctor will tell you the password when the prompt to enter it appears.
4. Reaching Examity Support.
Support is available 24 hours a day.
- Call: 1 (855) EXAMITY or 1 (855) 392-6489
- Email: support@examity.com
- Live Chat: Click the tab on the bottom of your screen in Examity